How do I start a blog? This comprehensive step by step guide shows you how to create a blog from the very beginning. Setting up a blog is actually easier than you may think.

Step 1: How to Start a Blog – Find a Niche
If you have not already selected a niche then find out how to choose a niche here.
Tips to finding a niche:
- Select something you are passionate about, have a problem with or have a fear of and preferably a combination of all three.
- Avoid analysis paralysis, don’t over analyze your niche, believe in yourself and pull the trigger – there is no better time than now.
Step 2: How to Start a Blog – Choose a Domain Name
Selecting a domain name is not only important to your brand and image but can also improve your search engine optimization (SEO). If you have not already found and secured a domain name then read how to choose a domain name and then carry on with step 3.
Tips for choosing a domain name:
- Use Keywords
- Make the domain name easy to type and remember
- Don’t use numbers, symbols or hyphens
- Use a .com
- Don’t limit yourself in your domain name, nor make it too broad
- Get creative with your domain name, consider compromising and selecting something close to perfect
Extra Tip: Use a free service like Bust a Name and enter in your keywords to help generate domain name ideas, it will let you know which domain names are available.
Step 3: How To Start a Blog – Find a Host
If you want anyone other than your family to view your blog and you plan to make money from your blog down the road then I strongly recommend that you pay for a good host! The host provider I use for this website is Bluehost and the remainder of this tutorial is based on signing up with Bluehost; however, I also use and recommend SiteGround and iPage.
There are a variety of hosts out there: Good hosts, bad hosts, free hosts and expensive hosts. Selecting the wrong host can turn your blog experience into a nightmare. One of the hosts I caution you to stay away from is namecheap. If your site is down for any period of time then your followers may lose interest and faith in you. Don’t risk it!
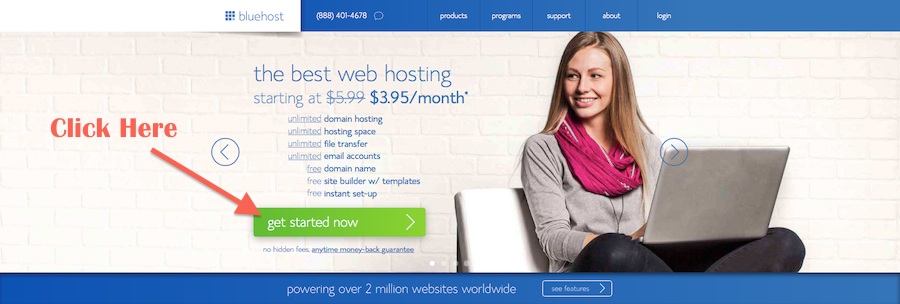
So, lets get started with Bluehost by clicking this link here. It will open in a new window so you can follow the remaining instructions.
Click on the “Get started now” button to create your host account for only $3.95 a month.
Step 4: How To Start a Blog – Select Your Plan
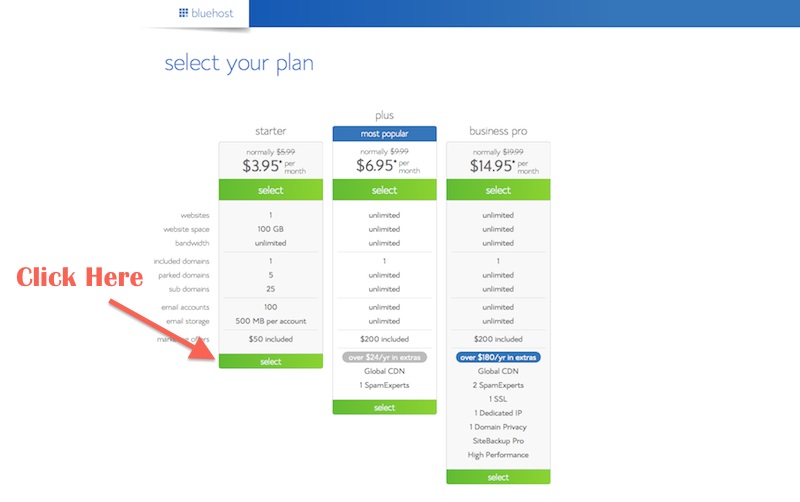
You only need the starter account for now. You are able to upgrade whenever you like once you create your blog. Save the money and wait until it is necessary.
Step 5: How To Start a Blog – Enter Your Domain Name

If you had completed step 2 already then enter in your domain name on the right. If you have not selected a domain name yet then choose now and enter it under “new domain” to see if it is available. If it is, then select next, if not try again until you find a domain name that is available to set up your blog. (side note: you may be able to find a cheaper domain name under other sites like GoDaddy)
Step 6: How To Start a Blog – Enter Account Information
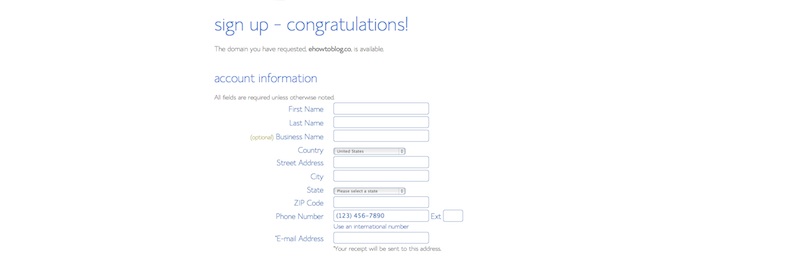
Step 7: How To Start a Blog – Choose the Hosting Package
Many people like to select the domain privacy protection as it keeps solicitors from e-mailing you constantly about how they can design a website for you or help with your SEO etc. It basically is a $10 per year payment to block an e-mail every second day. You decide if it is important to you.

Step 8: How To Start a Blog – Payment Information
You can either enter your credit card information or select “more payment options” and pay by paypal. Once you have selected the method of payment complete the information, confirm you have read the terms of service and select next. Skip all unnecessary upgrades in next page.

Step 9: How To Start a Blog – No Upgrades Required
Skip all the upgrades as none of them are necessary. Complete your purchase and then go in to your e-mail account and to retrieve your login information.
Step 10: How To Start a Blog – Install WordPress
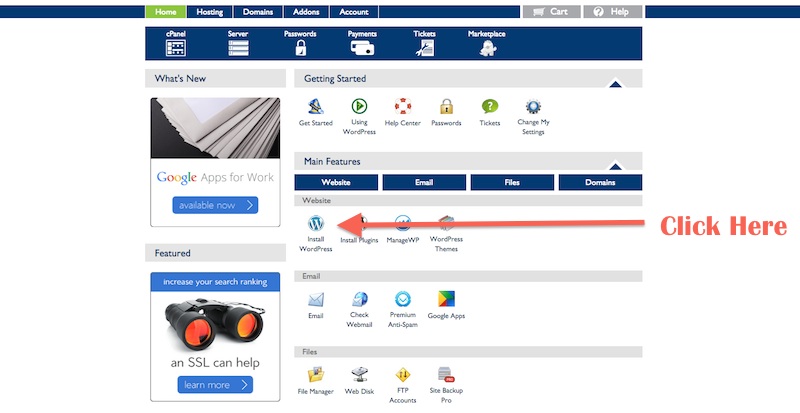
Go to Bluehost and select “login” at the top right of the screen and use the information from the e-mail to log in. Once logged in you will see a screen that resembles the screen shot below. Click the “install wordpress” picture.
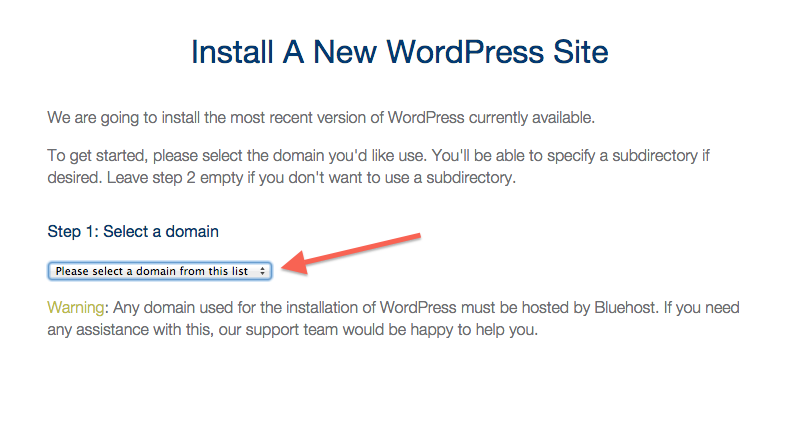
Then select your domain from the drop down menu and follow the remaining prompted steps to complete the wordpress install.
Congratulations you have just created a blog!
Now that you have started a blog you will need to login to the back end of wordpress and begin designing your blog and creating content.
Leave a Reply